
Understand your Camera – Buying Tips with Real Life Experiences to Help you Choose.

Prompted by a friend’s request for advice in buying a camera I thought I’d share some real life experiences of what I feel is important when buying a camera, and not just for use as a commercial photographer the advice would apply at any level. These are just my opinions and are not sponsored or influenced in any way, feel free to disregard them.
Buy The Best You Can
As with other purchases in life I try to always buy the best I can afford at the time, whether that’s a car, washing machine, TV or indeed, camera equipment. I’ve always tried to future-proof myself so that I do not always have to upgrade things too often. When it comes to my camera I bought my first DSLR in 2008, it was a Nikon D40x, that had 10 megapixels and came equipped with an 18-135mm lens, which is a decent range of zoom. I started to contribute to magazines with that very basic setup but after a while I was looking at the images that other contributors had submitted and knew I had to up my game. I did I lot of research and bought another Nikon, for me I knew the layout of the camera and a good deal came up on the model I was looking at but I could have just has easily bought a Canon. I changed to the D7100 which was released in 2013, although the sensor was the same size the D40x’s it was a 24 megapixel version so the images could be more easily cropped or provide better quality when printed. The 7100’s ISO capabilities were much better too meaning that it could provide superior images in low light situations, I stuck with this for a while until I was on a paying job and the situation demanded I work in much lower light than I was used to, after wrestling with the images in Lightroom to bring them up to a standard I was happy to submit to the client I decided that I was never going to go through that again and upgraded again to the D7200, which has just over double the ISO capabilities of the 7100. As always I bought second-hand from a reputable dealer and was very happy with the results the 7200 brought with it, however, with that said I’m hoping to upgrade again soon but this time to a camera with a full frame sensor rather than the crop sensor ones I’ve been using. I won’t bore you with the details, and if you’re just starting out, don’t spend a lot of money until you know that photography is for you.
Ease of Adjustment
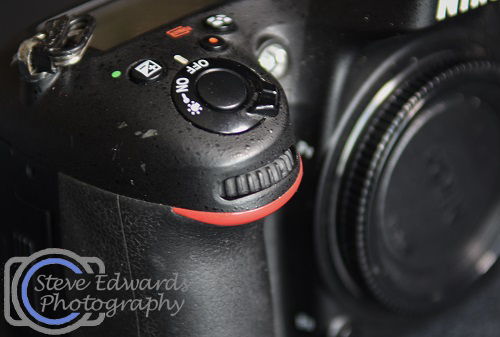
When you’re working with a camera, or any other tool for that matter, if it’s possible to set it up so it’s comfortable for you to use, then it’s pretty obvious that you should. My first camera had one wheel on the back and to adjust the shutter speed, aperture and ISO, the latter settings being accessed by pressing a button and then rotating the wheel. This is a little tiresome to be honest, all my subsequent equipment has had an additional front wheel, the rear controls the shutter speed and the front the aperture. This makes changing settings while shooting so much easier and it’s my top tip if you’re in the market.

Custom Buttons
DSLR’s have loads of buttons, some of which you may never use, but as the majority of camera can operate in video mode too they have the functions for those to hand. While in still photo mode these buttons are then redundant, or are they? It is possible to change the button function so that rather than do nothing they can be of use, on my 7200 I’ve delved into the menus and changed the role of the Video Record button so that when pressed and in conjunction with the rear wheel, I can change the camera’s ISO. For more info on ISO and shooting in Manual see my previous post on the subject.

Auto Focus Points
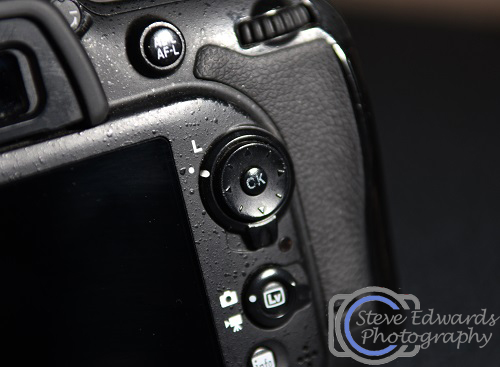
Camera manufactures include many auto focus points in the cameras, this means that by default that all are active and the camera will focus on a point of its choosing, meaning any point in your viewfinder and not necessarily the point that you wanted. The camera can only focus on one point at a time, even if it has 51 or more points in your viewfinder, just one is getting priority. The best thing to do, obviously, is to disengage this mode and switch to a single auto focus point that you can then move around using the controller on the rear of the camera, it’s a circle and very similar to ones found on TV remotes and used in exactly the same way. So don’t let the amount of auto focusing points sway your buying decision, as it’s pointless!
ISO
ISO is very important to me as I spend a lot of time at various networking events in Nottingham taking pictures for the organisers to promote future events. When I’m shooting cars and vans I try to be in the lowest number I have, 100, as the higher you go with the adjustments the grainier the images will become. If you are mostly shooting in natural light, or with flash, then having a high ISO wouldn’t really need to be a consideration for you.
Lenses
Your DSLR will need a lens or two but which to buy? That does depend on what you’re planning on taking photos of, if you’re thinking about real close up images on insects and flowers then a specialist lens is what you need, but for general usage then something with a good range of zoom would be handy. As I already stated my first camera came with a 18-135mm zoom lens, but when I upgraded I went for a AF-S 17-55mm f2.8 DX one instead which was released in 2003 and at the time was better than the cameras it was attached too. It was only when the capabilities of the camera bodies improved was the lens able to show itself to its best advantage. But what do all those numbers and letters mean?
AF-S signifies that the lens is equipped with Nikon’s Silent Wave Autofocus motor.
17-55mm is the focal length the lens covers.
F2.8 is the maximum aperture available.
The DX signifies the lens is suitable for crop sensor cameras only.

This lens received great reviews and has been my main lens on both the 7100 and 7200, I even used it to take the shots for this post, it’s a perfect all-rounder and I’d definitely recommend it, however while it’s not the cheapest around and it is a bit of a lump at 755g, it certainly has been the best for my money as all of my magazine shoots have been taken with it.

I always protect my lenses with a suitable Ultraviolet filter, as the filter not only absorbs the UV rays that can sometimes make outdoor photography a little hazy, but it’s a level of protection if you happen to do the unthinkable and drop your camera, and yes, I speak from experience, the filter saved me from an expensive repair so I always add one.
So then, what to buy? As I said at the beginning, it depends on what you’re planning on taking pictures of as to what kit you should buy, you can spend a lot of money on high end equipment or just dip your toe in the water with kit that is considerably cheaper. Personally, I chose the latter, well I say chose but the decision was really determined by the available cash I had if I’m honest, but as I’ve needed to improve the quality of my kit has too and this will continue as I go forward.
I hope this has helped but if you have any questions you think I can answer, feel free to contact me, I’m happy to be of assistance if I can.
**UPDATE**
Since I wrote this blog I have since upgraded again, this time to a Nikon d810 which is my first full frame camera, this has taken me out of the realms of semi-pro equipment and elevated me into professional photography equipment. I had to change a couple of the lenses as they were not compatible but it was an easy transition and one I’m very happy to have made.